|
Lithiumate™ Manual |
|
Lithiumate™ Manual |
|
index Install - Cable mount current sensors Installations and wiring instructions for the 2CS0xx0K series, 50 to 600 A, bidirectional, cable mounted current sensors 

Unfortunately, we do not have the resources to teach all of our clients proper assembly procedures, which are essential for a succesful project. What we can do is to pass along this info to you:
Because the desired cable length is not known a priori, the sensor comes with an unterminated cable and a connector kit. Use these instructions to terminate the cable in the field. 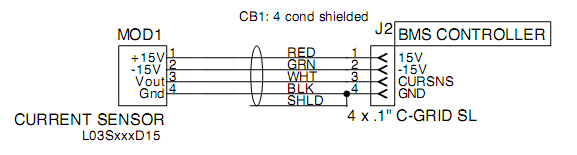
Schematic of cable mount current sensor
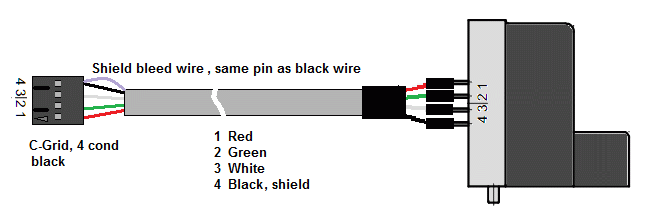
Assembly diagram of cable mount current sensor For replacement parts, see the parts list
Direction of current in current sensor For your reference, current flow is:
The biggest wire that fits in the opening in the cable mounted current sensor can carry far more current than the sensor can detect. So, if your cable doesn't fit, either the current sensor is undersized for your application (e.g.: you're using a 500 A current sensor in a 5000 A application), or the wire is oversized for the application (e.g.: you're using a wire for 2000 A average when it only carries 100 A average). In an EV, it can be counterproductive to use 1/0 AWG for a wire that carries 100 A average current: the energy you saved by reducing power losses may be lost in needlessly carrying all that extra copper around. Regardless, if the cable is too large for the opening on the sensor, you may:
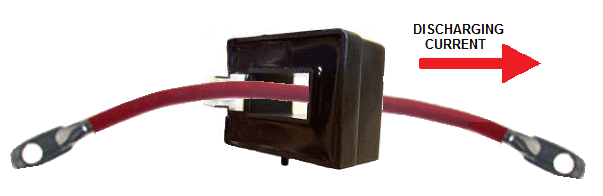
Bar-mounted current sensor
Configuration instructions for a load current sensor.
We never suggest that someone should use both a 600 A and a 50 A current sensor. If you use the automatic quote generator, and answer its questions, it tells you to use just the 600 A current sensor for both the charger current and the load current. It does not tell you to use 2 separate current sensors. Having said that, there is a way for this BMS controller to use both a 600 A and a 50 A current sensor, but it's a bit complicated. It entails powering both sensors from the EXT CURRENT SENSOR connector, but wiring the output of the 600 A sensor to the EXT CURRENT SENSOR connector, and the output of the 50 A sensor to the white CONTROL connector. The 600 A load current sensor will be bidirectional (discharging and regen), while the 50 A current sensor will be unidirectional (charging). You must not splice the 2 sensors outputs together: they will fight each other. Instructions:
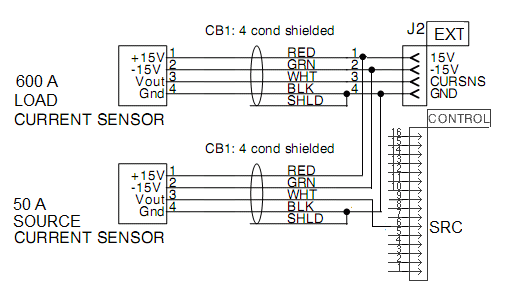
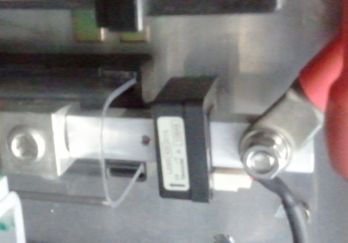
Example of two cable mounted current sensors. 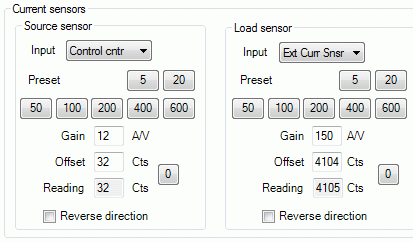
Screenshot of configuration tab in GUI, while there's 0 current through sensors. | ||
© 2008~2025 Elithion™, LLC. All rights reserved, except where noted by CC mark. Page published on May 07 2024.
The Elithion brand and the 'ə' (upside down 'e') logo are Trademarks of Elithion LLC. Graphic design by morninglori